You may have heard of PirateBox, a free and open source software system (with some recommended hardware platforms) for creating what is essentially a wireless dead drop. I like the idea behind PirateBox because it's a project that sits at the intersection of cool technology, statement on digital rights, and art.
So realizing I had some spare things lying around I decided to make one.
Important note before we continue: PirateBox has downloadable distributions for various routers and Raspberry Pis that are basically turnkey and should Just Work. In this blog post we explicitly don't use these because I wanted to do everything myself, including most of the software and configuration.
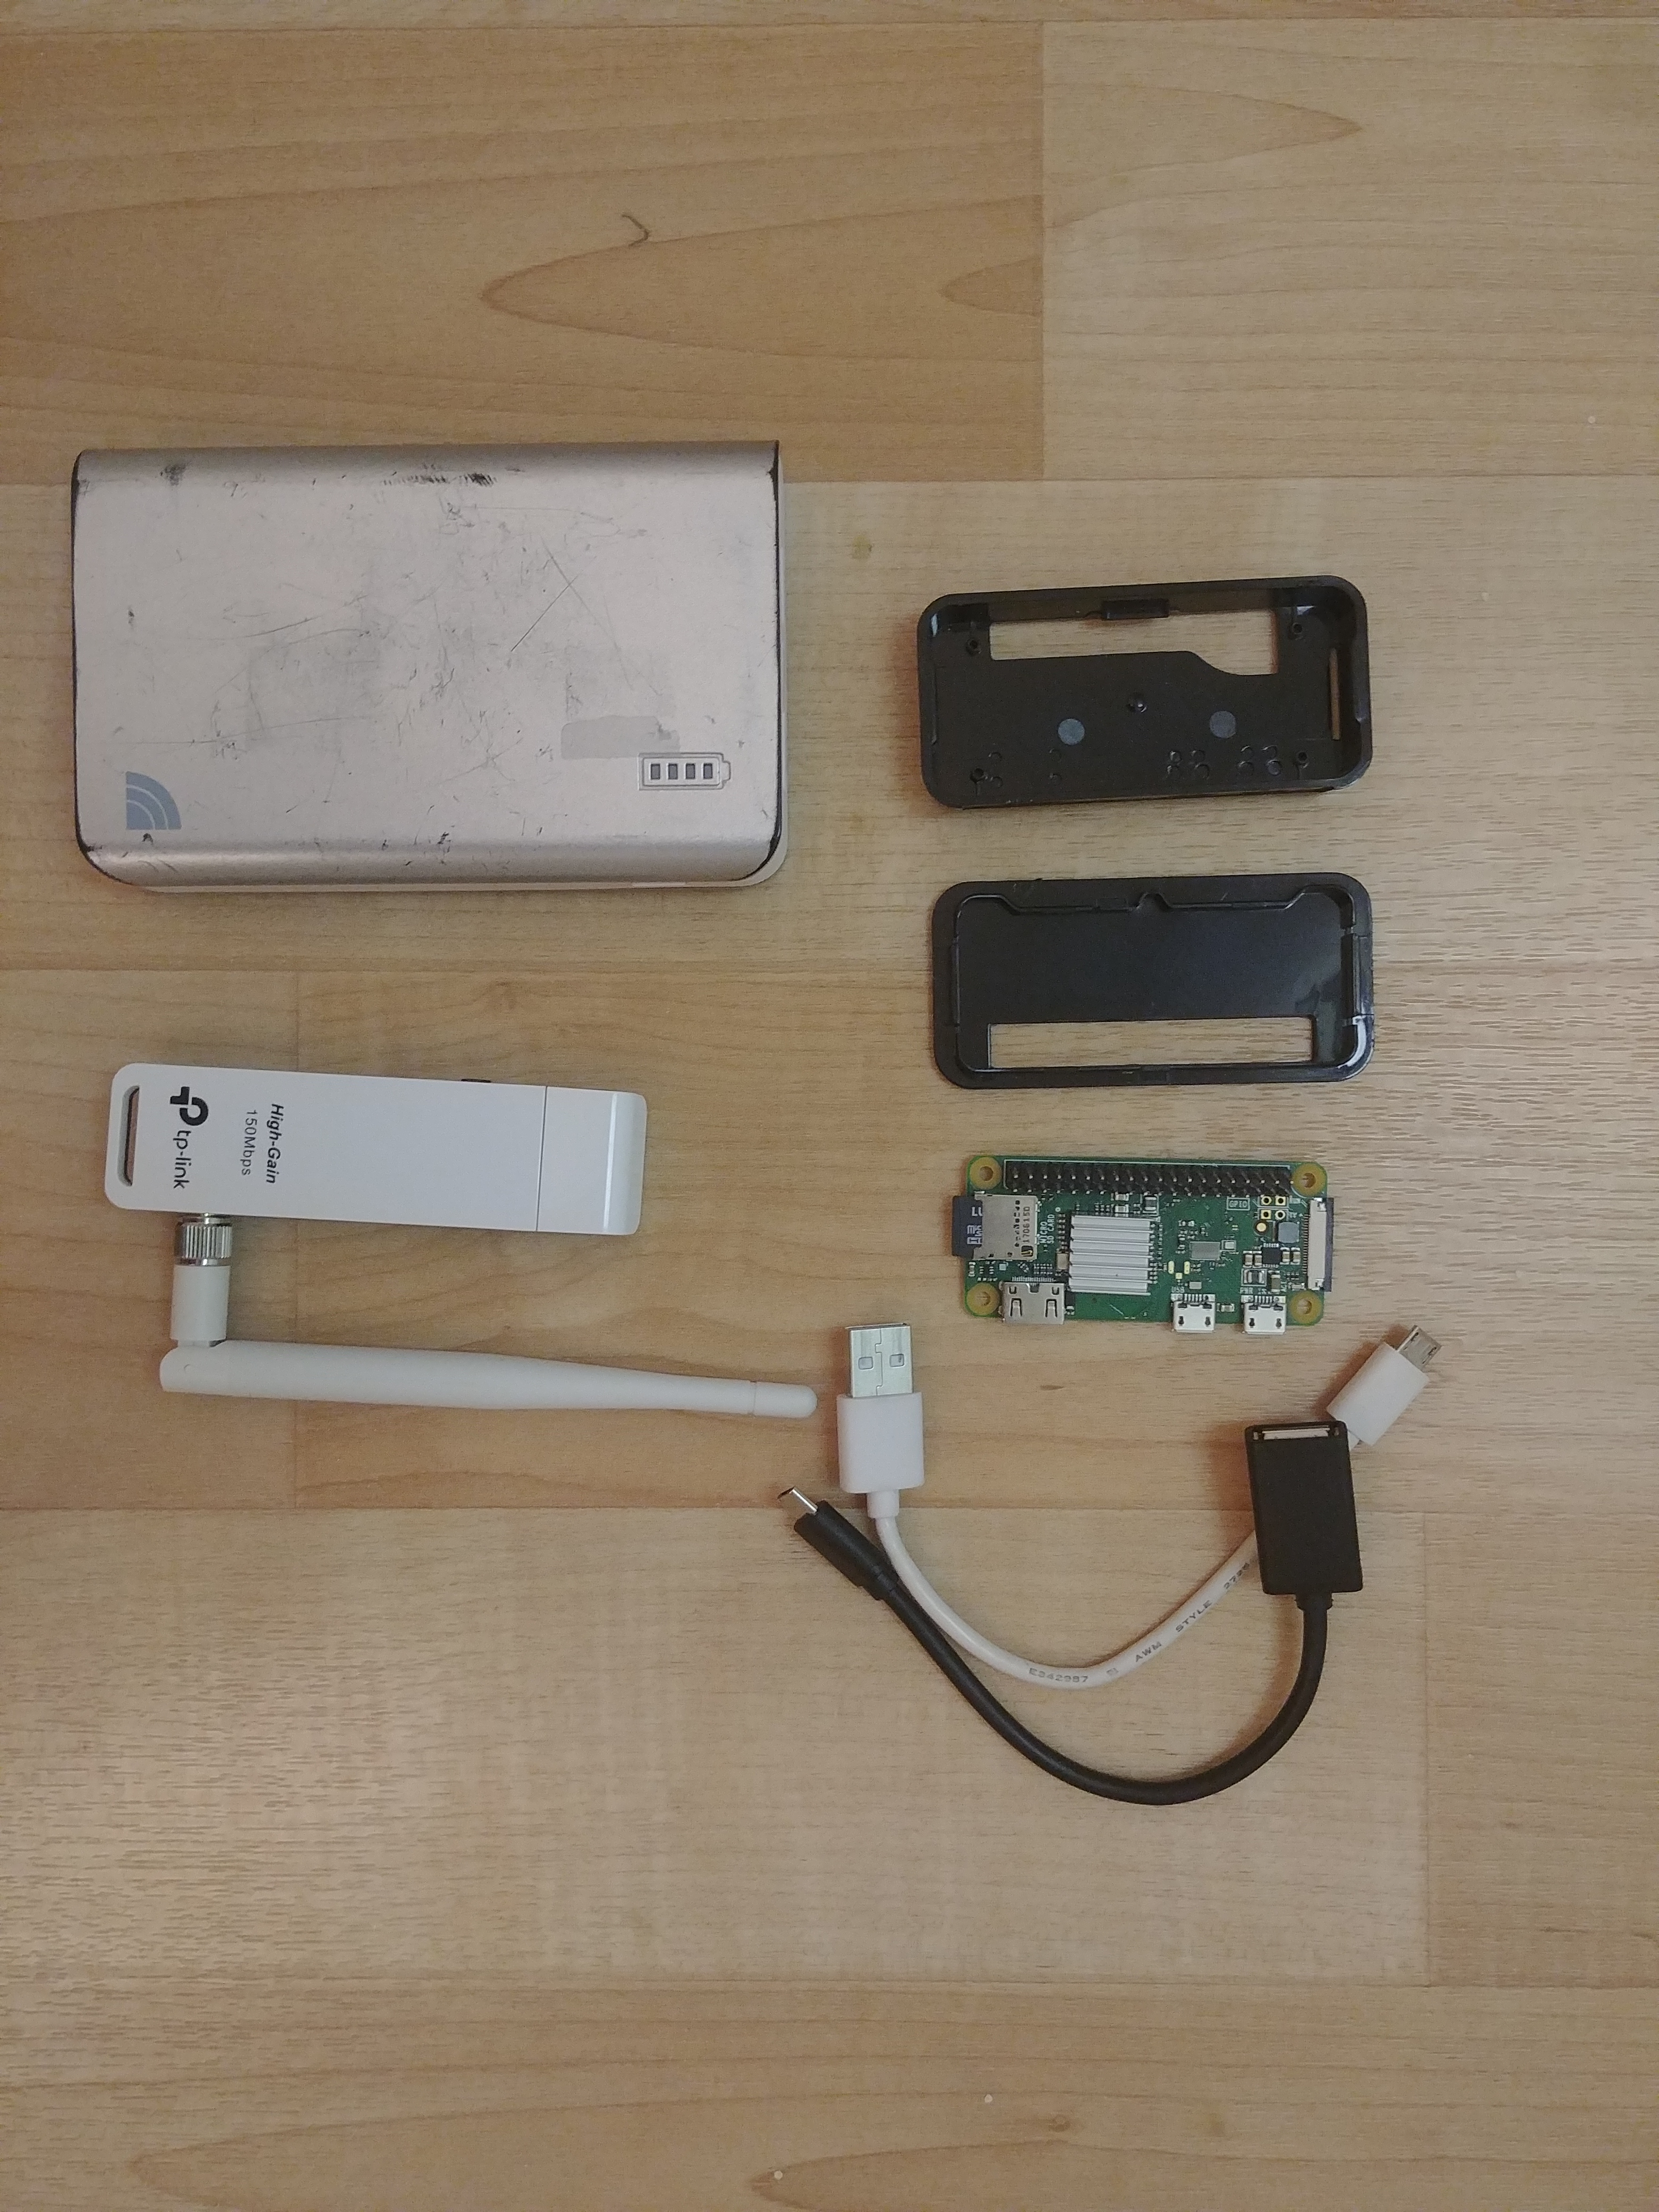
Materials

- Pi Zero W (repurposed from a defunct project)
- A case might be helpful to have too
- Some sort of battery pack (I had a 17000mAh one for phones lying around)
- Some sort of wireless adapter (I wasn't satisfied with the built in wireless and I wanted something more high powered)
- OTG cable
- Non OTG cable
- Some patience, probably
The wireless adapter
Though it's unrelated to the purpose of this project in particular, I wanted another TL-WN22N v1 (the kind with the useful AR9271 chipset). It happens to be a good general purpose wireless adapter in any case. Unfortunately they're a little hard to find these days, so I played the Amazon hardware revision lottery on a listing that didn't say which revision it was explicitly, and lost, ending up with a v2. Oh well.
The important thing to know is v2 is based on the garbage RTL8188 chipset, and we'll need to compile drivers to get it to play nice with wpa_supplicant later.
The software
There is an official PirateBox distribution for Raspberry Pis. However I ended up being unhappy with the official release so I decided to rewrite most of the backend and roll my own distribution of the system. I like doing things myself instead of going with the premade solution sometimes.
The code can be found here: https://git.lain.faith/haskal/piratebox-web/
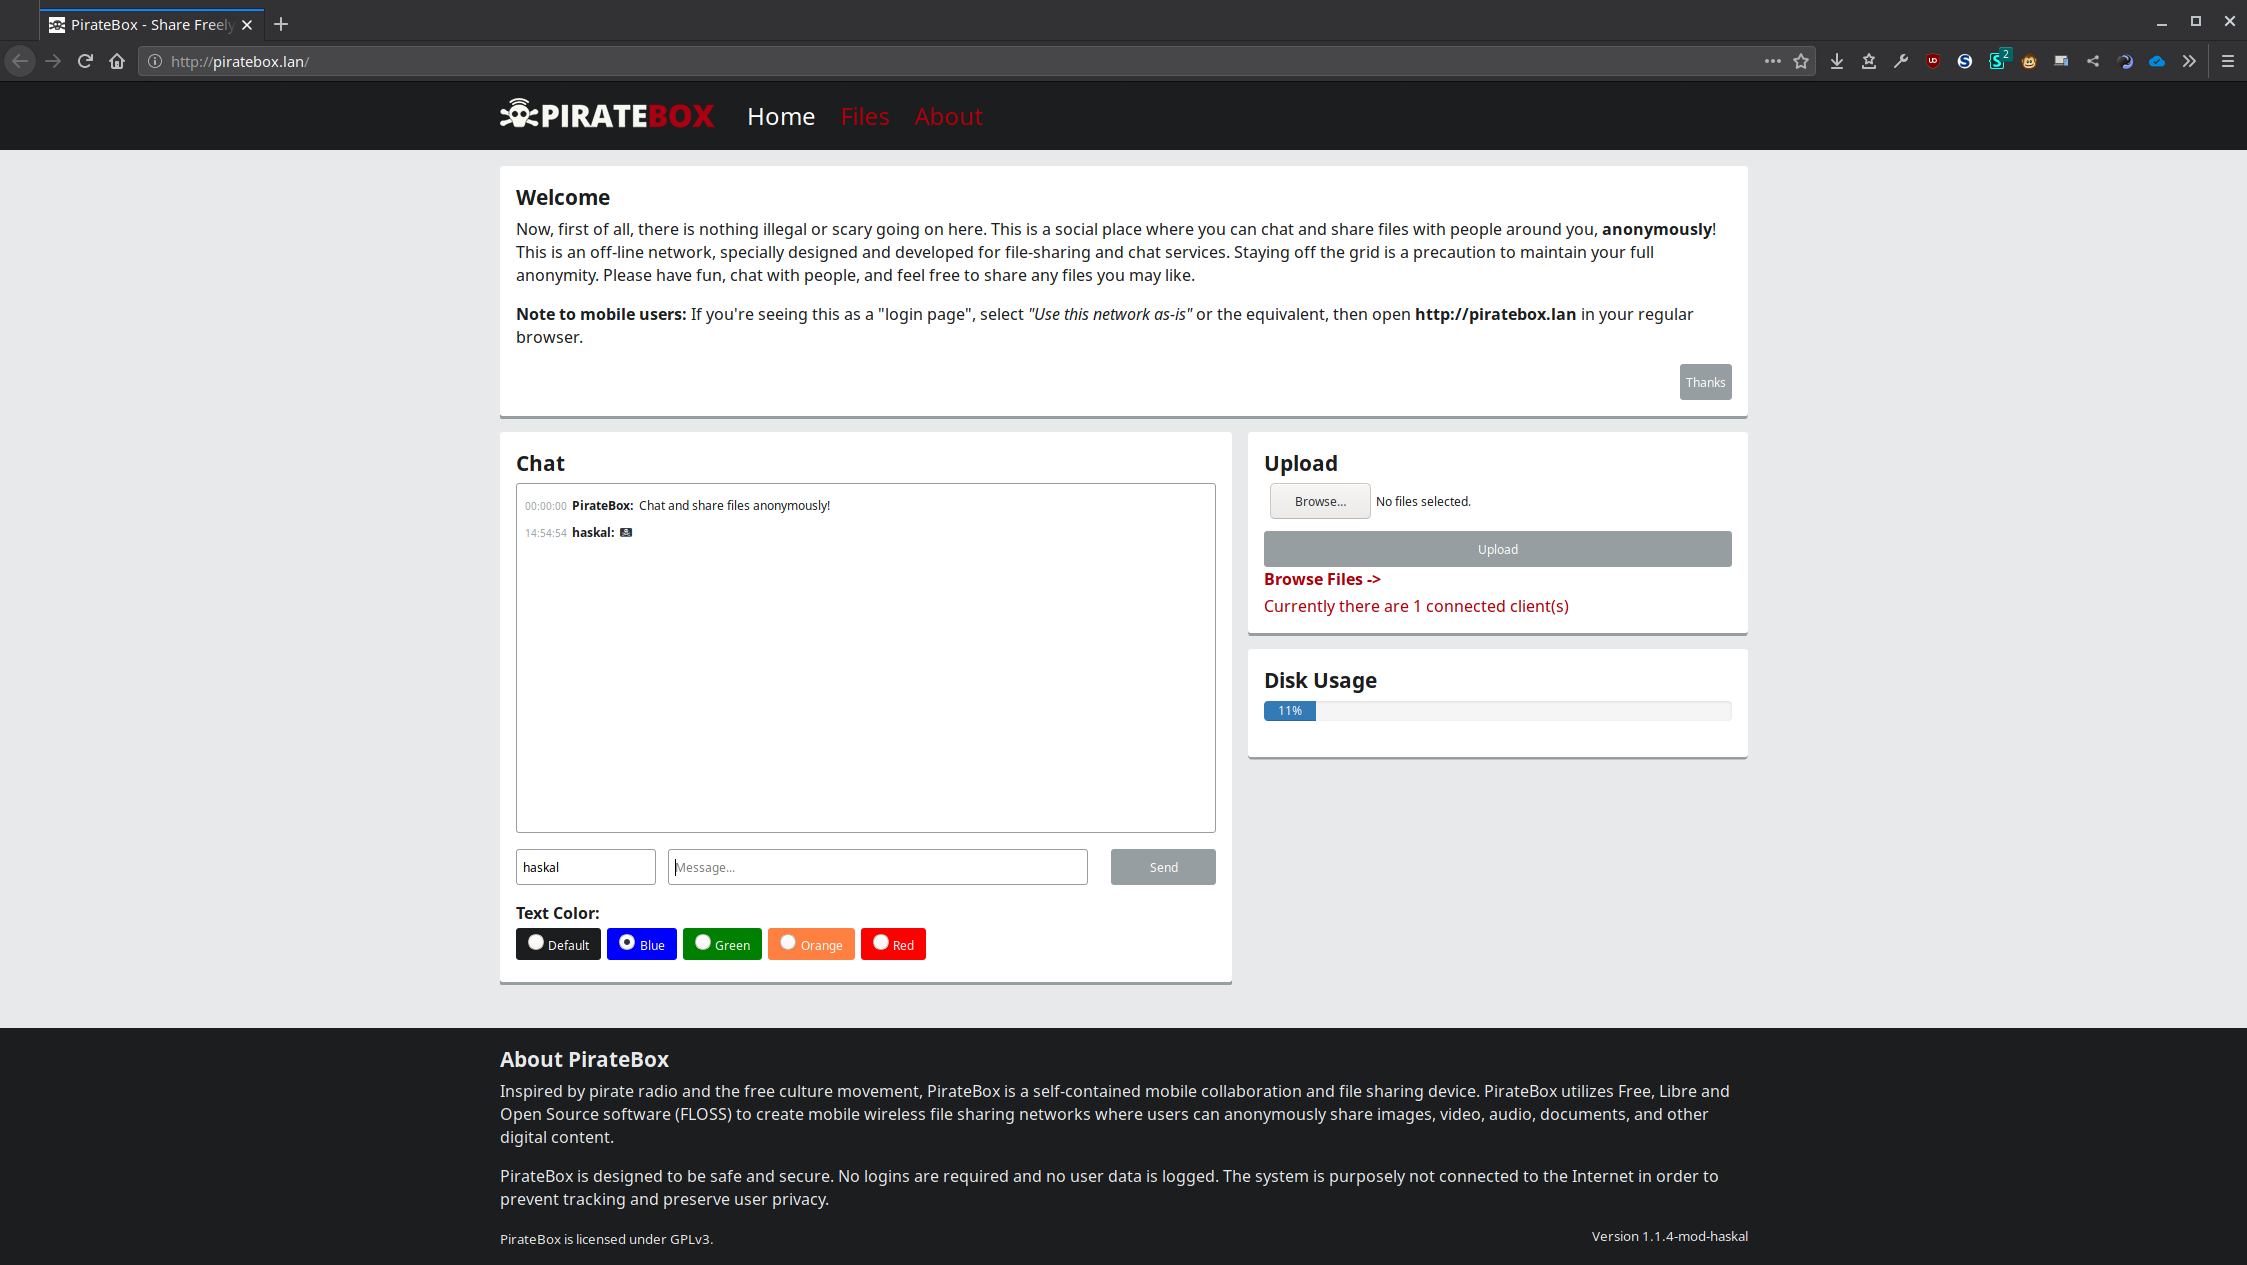
I kept most of the frontend, and it visually looks the same as the official PirateBox release, but the backend is now consolidated into a single (simpler) python script running a webserver based on aiohttp. I also removed the forum feature (I didn't feel like porting it) and added support for unlocking ext4 file based encryption via the web UI, since I wanted my PirateBox to have files and file names encrypted at rest.
Building the software
git clone https://git.lain.faith/haskal/piratebox-web.git
cd piratebox-web
# this could stand to be a little less convoluted, probably
make
cp pb-haskal-1.1.4.tar.xz arch/
cd arch/
makepkg -s
# wow, it's arch packaging
Building an image
I'm too cool for Raspbian so we're using Arch Linux Arm. You may have noticed the repo contains arch packaging, because I like properly installing things instead of polluting the root filesystem with stuff that isn't tracked by the package manager.
Get the latest release of Arch Linux Arm for ARMv6 Raspberry Pi. Use cfdisk/parted/gparted/whatever to partition your SD card into:
- 128M fat32 boot
- 2G ext4 rootfs
- $REST ext4 data
Initial setup time
mount /dev/mmcblk0p2 /mnt
mkdir /mnt/boot /mnt/storage
mount /dev/mmcblk0p1 /mnt/boot
mount /dev/mmcblk0p3 /mnt/storage
bsdtar -xpf ArchLinuxARM-rpi-latest.tar.gz -C root
# Copy in important things from my piratebox repo
cp $PIRATEBOX_REPO_DIR/arch/piratebox-*-any.pkg.tar.xz /mnt
cp $PIRATEBOX_REPO_DIR/piratebox_nginx.conf /mnt
sync
# I have a garbage slow SD card, so I needed to wait quite a bit for the sync
Now it's time for black magic. If you're on an arch host install qemu-arm-static, then simply arch-chroot into the setup:
arch-chroot /mnt
# Basic setup
pacman-keyring --init
pacman-keyring --populate
pacman -Syu base-devel sudo networkmanager vim nginx openssh dnsmasq wpa_supplicant e2fsprogs
systemctl enable NetworkManager.service sshd.service
# You may want to allow wheel or alarm sudo access here
visudo
# Edit locales
echo en_US.UTF-8 >>/etc/locale.gen
locale-gen
echo LANG=en_US.UTF-8 > /etc/locale.conf
# rename
hostnamectl set-hostname piratebox
# change passwords here
passwd alarm
# Consider hardening SSH by adding your public key and setting PasswordAuthentication=no and PermitRootLogin=no in /etc/ssh/sshd_config
I also needed a tweak to systemd-resolved using my (currently non-DNSSEC) resolvers. Edit /etc/systemd/resolved.conf and add
DNSSEC=no
DNSOverTLS=no
Next, edit fstab. Here's mine. Note the tmpfs entries at the end, those are for when we eventually turn the root partition read-only.
/dev/mmcblk0p1 /boot vfat defaults,ro,errors=remount-ro 0 0
/dev/mmcblk0p3 /storage ext4 rw,relatime,nodelalloc,errors=remount-ro,data=writeback,noauto_da_alloc,nosuid,noexec,nodev 0 2
tmpfs /var/log tmpfs nodev,nosuid 0 0
tmpfs /var/tmp tmpfs nodev,nosuid 0 0
tmpfs /var/lib/NetworkManager tmpfs nodev,nosuid 0 0
Aside: Developing directly on the Pi Zero
If you want to continue directly on your Pi Zero, you can configure it with the gadget ethernet driver and plug it directly into your PC.
Add the following to /boot/config.txt
dtoverlay=dwc2
and append to the command line in /boot/cmdline.txt
modules-load=dwc2,g_ether
Finally configure /etc/NetworkManager/NetworkManager.conf
[device-usb0]
match=interface-name:usb0
managed=1
Now, eject your SD card, stick it in your Pi Zero, and plug it into your computer. Set up connection sharing (eg with NetworkManager) and the pi should automatically connect to you.
Alternatively, you can also continue setting up the image inside the qemu chroot on your host.
Compiling drivers, or, Realtek Why Are You Like This
So I needed capabilities to create a wifi AP off of an RTL8188-based adapter. Unfortunately as I learned the hard way, the default r8188eu driver really sucks and doesn't let us do anything. Fortunately, there's a better driver available.
pacman -S dkms git
git clone https://github.com/aircrack-ng/rtl8188eus
cd rtl8188eus
Edit the Makefile. Change the following.
CONFIG_PLATFORM_I386_PC = n
CONFIG_PLATFORM_ARM_RPI = y
Then build and install (using the instructions from the readme)
cp realtek_blacklist.conf /etc/modprobe.d/
make && make install
But haskal you said you didn't like polluting your rootfs with stuff that isn't tracked by pacman what is this
make install
Shush
rmmod 8188eu && insmod 8188eu.ko
echo 8188eu > /etc/modules-load.d/8188eu.conf
Disabling builtin wifi, and other things
Disable builtin wifi by blacklisting the kernel modules for it.
echo "blacklist brcmfmac" >> /etc/modprobe.d/disable-builtin-wifi.conf
echo "blacklist brcmutil" >> /etc/modprobe.d/disable-builtin-wifi.conf
Other power saving measures, stolen from the internet:
vim /opt/conserve_power.sh
# contents:

#!/bin/bash

echo Enabling extra power saving
# Disable video out, since we are h e a d l e s s
/opt/vc/bin/tvservice -o
# Disable the status LED
echo none | tee /sys/class/leds/led0/trigger
echo 1 | tee /sys/class/leds/led0/brightness
echo Done
vim /etc/systemd/system/conserve-power.service
# contents:

[Unit]
Description=Configures some extra power saving

[Service]
Type=oneshot
RemainAfterExit=yes
ExecStart=/opt/conserve_power.sh

[Install]
WantedBy=multi-user.target
and of course systemctl enable conserve-power.service
Hijacking the internets
Now we can configure the wireless hotspot and captive-portal-like redirection for convenience on mobile clients.
vim /etc/NetworkManager/system-connections/piratebox.nmconnection
# contents:

[connection]
id=piratebox
uuid=# Generate a uuid, eg with uuidgen(1)
type=wifi
interface-name=piratebox0
permissions=

[wifi]
cloned-mac-address=# INSERT SOMETHING GOOD HERE, if you want. The NSA prefix is 00:20:91
mac-address-blacklist=
mode=ap
ssid=PirateBox - Share Freely

[ipv4]
address1=10.42.42.1/24
dns-search=
method=shared

[ipv6]
addr-gen-mode=stable-privacy
dns-search=
method=ignore # I'm not cool enough for ipv6 yet. maybe you are
Now redirect the DNS
echo "address=/#/10.42.42.1" > /etc/NetworkManager/dnsmasq-shared.d/redirect-all.conf
And iptables too, for good measure
vim /etc/systemd/system/iptables-redirect.service
# contents:

[Unit]
Description=iptables rules for captive portal
After=network.service

[Service]
Type=oneshot
RemainAfterExit=yes
ExecStart=/bin/bash -c "iptables -t nat -A PREROUTING -p tcp --dport 443 -i piratebox0 -j DNAT --to-destination=10.42.42.1; iptables -t nat -A PREROUTING -p tcp --dport 80 -i piratebox0 -j DNAT --to-destination=10.42.42.1"

[Install]
WantedBy=multi-user.target
and systemctl enable iptables-redirect
SSL?
You may have noticed a port 443 in the iptables rules. Now since this is a private offline network with a server hosted at piratebox.lan, we obviously can't get real SSL certs, but I was worried that entering the file based encryption password over plain HTTP over an obviously open network could potentially be sniffed, so I created a new CA and cert for piratebox.lan and had my devices trust my CA. I won't go into how to do this here, there are probably plenty of guides online (see the openssl command and easy-rsa).
Actually installing the software
We're ready to install the actual PirateBox software, hopefully.
pacman -U /piratebox-*.pkg.tar.xz
systemctl enable piratebox.service
cp -f /piratebox_nginx.conf /etc/nginx/nginx.conf
nginx -s reload
Captive portal
One of the significant parts of the nginx config for this is the captive portal stuff. It's very basic, and I haven't actually tested the Microsoft one. This config ensures that when mobile devices connect to the PirateBox network, our homepage pops up.
I experimented with faking an actual 204 response for /generate_204 to trick Android into thinking it's connected to the internet, because it turns out that from the captive portal login screen (at least on my phone) I cannot actually upload files. I couldn't get it to work, so unfortunately with this setup on Android you have to tap the "Use this network as-is" option and then open http://piratebox.lan in a real browser.
# Android
location /generate_204 {
    return 302 http://piratebox.lan/;
}

# Apple
location /hotspot-detect.html {
    return 302 http://piratebox.lan/;
}

# Microsoft
location /ncsi.txt {
        add_header Content-Type "text/plain";
        return 200 "Microsoft NCSI";
}
Storage setup
Set up the storage partition and configure file based encryption.
# enable FBE
tune2fs -O encrypt /dev/mmcblk0p3
# create piratebox file storage directory
mkdir /storage/piratebox
# the piratebox user gets created by systemd
chown piratebox:piratebox /storage/piratebox
# create a password
e4crypt add_key
# enter a password at the prompt
# you should get output like Added key with descriptor [SOME_ID]
e4crypt set_policy <SOME_ID> /storage/piratebox
yay, security...
Switch to read only
We want the PirateBox to be resilient against power failure and such. It's on a battery pack after all. So to ensure system integrity, we can set the rootfs to be read-only. The fstab is already set up with tmpfs mounts for everything this system should want to write to. The storage partition needs to be read-write for obvious reasons (it's the whole point of the PirateBox!) so I included some mount options in the fstab that might help with keeping that consistent and hopefully avoiding the need for manual fscks in the event of a power loss that interrupts a write.
To change the rootfs to read only, open /boot/cmdline.txt. Change rw to ro. That's it! Now you're free to just unplug the thing without fear of system corruption.
Do you have the time?
There is a small issue that on reboots the Pi loses system time. And since we're not on the internet, there are no NTP servers to sync with. Other PirateBox users have solved this issue by attaching a battery-backed RTC to their Pis. Alternatively, you can use the haskal Inaccurate Network Time Protocol like this
ssh alarm@piratebox.lan -- "sudo date +%s -s @$(date +%s)"
Add the following to /etc/sudoers on the Pi to make it work
alarm ALL=(ALL:ALL) NOPASSWD:/usr/bin/date
Wow it's a PirateBox!
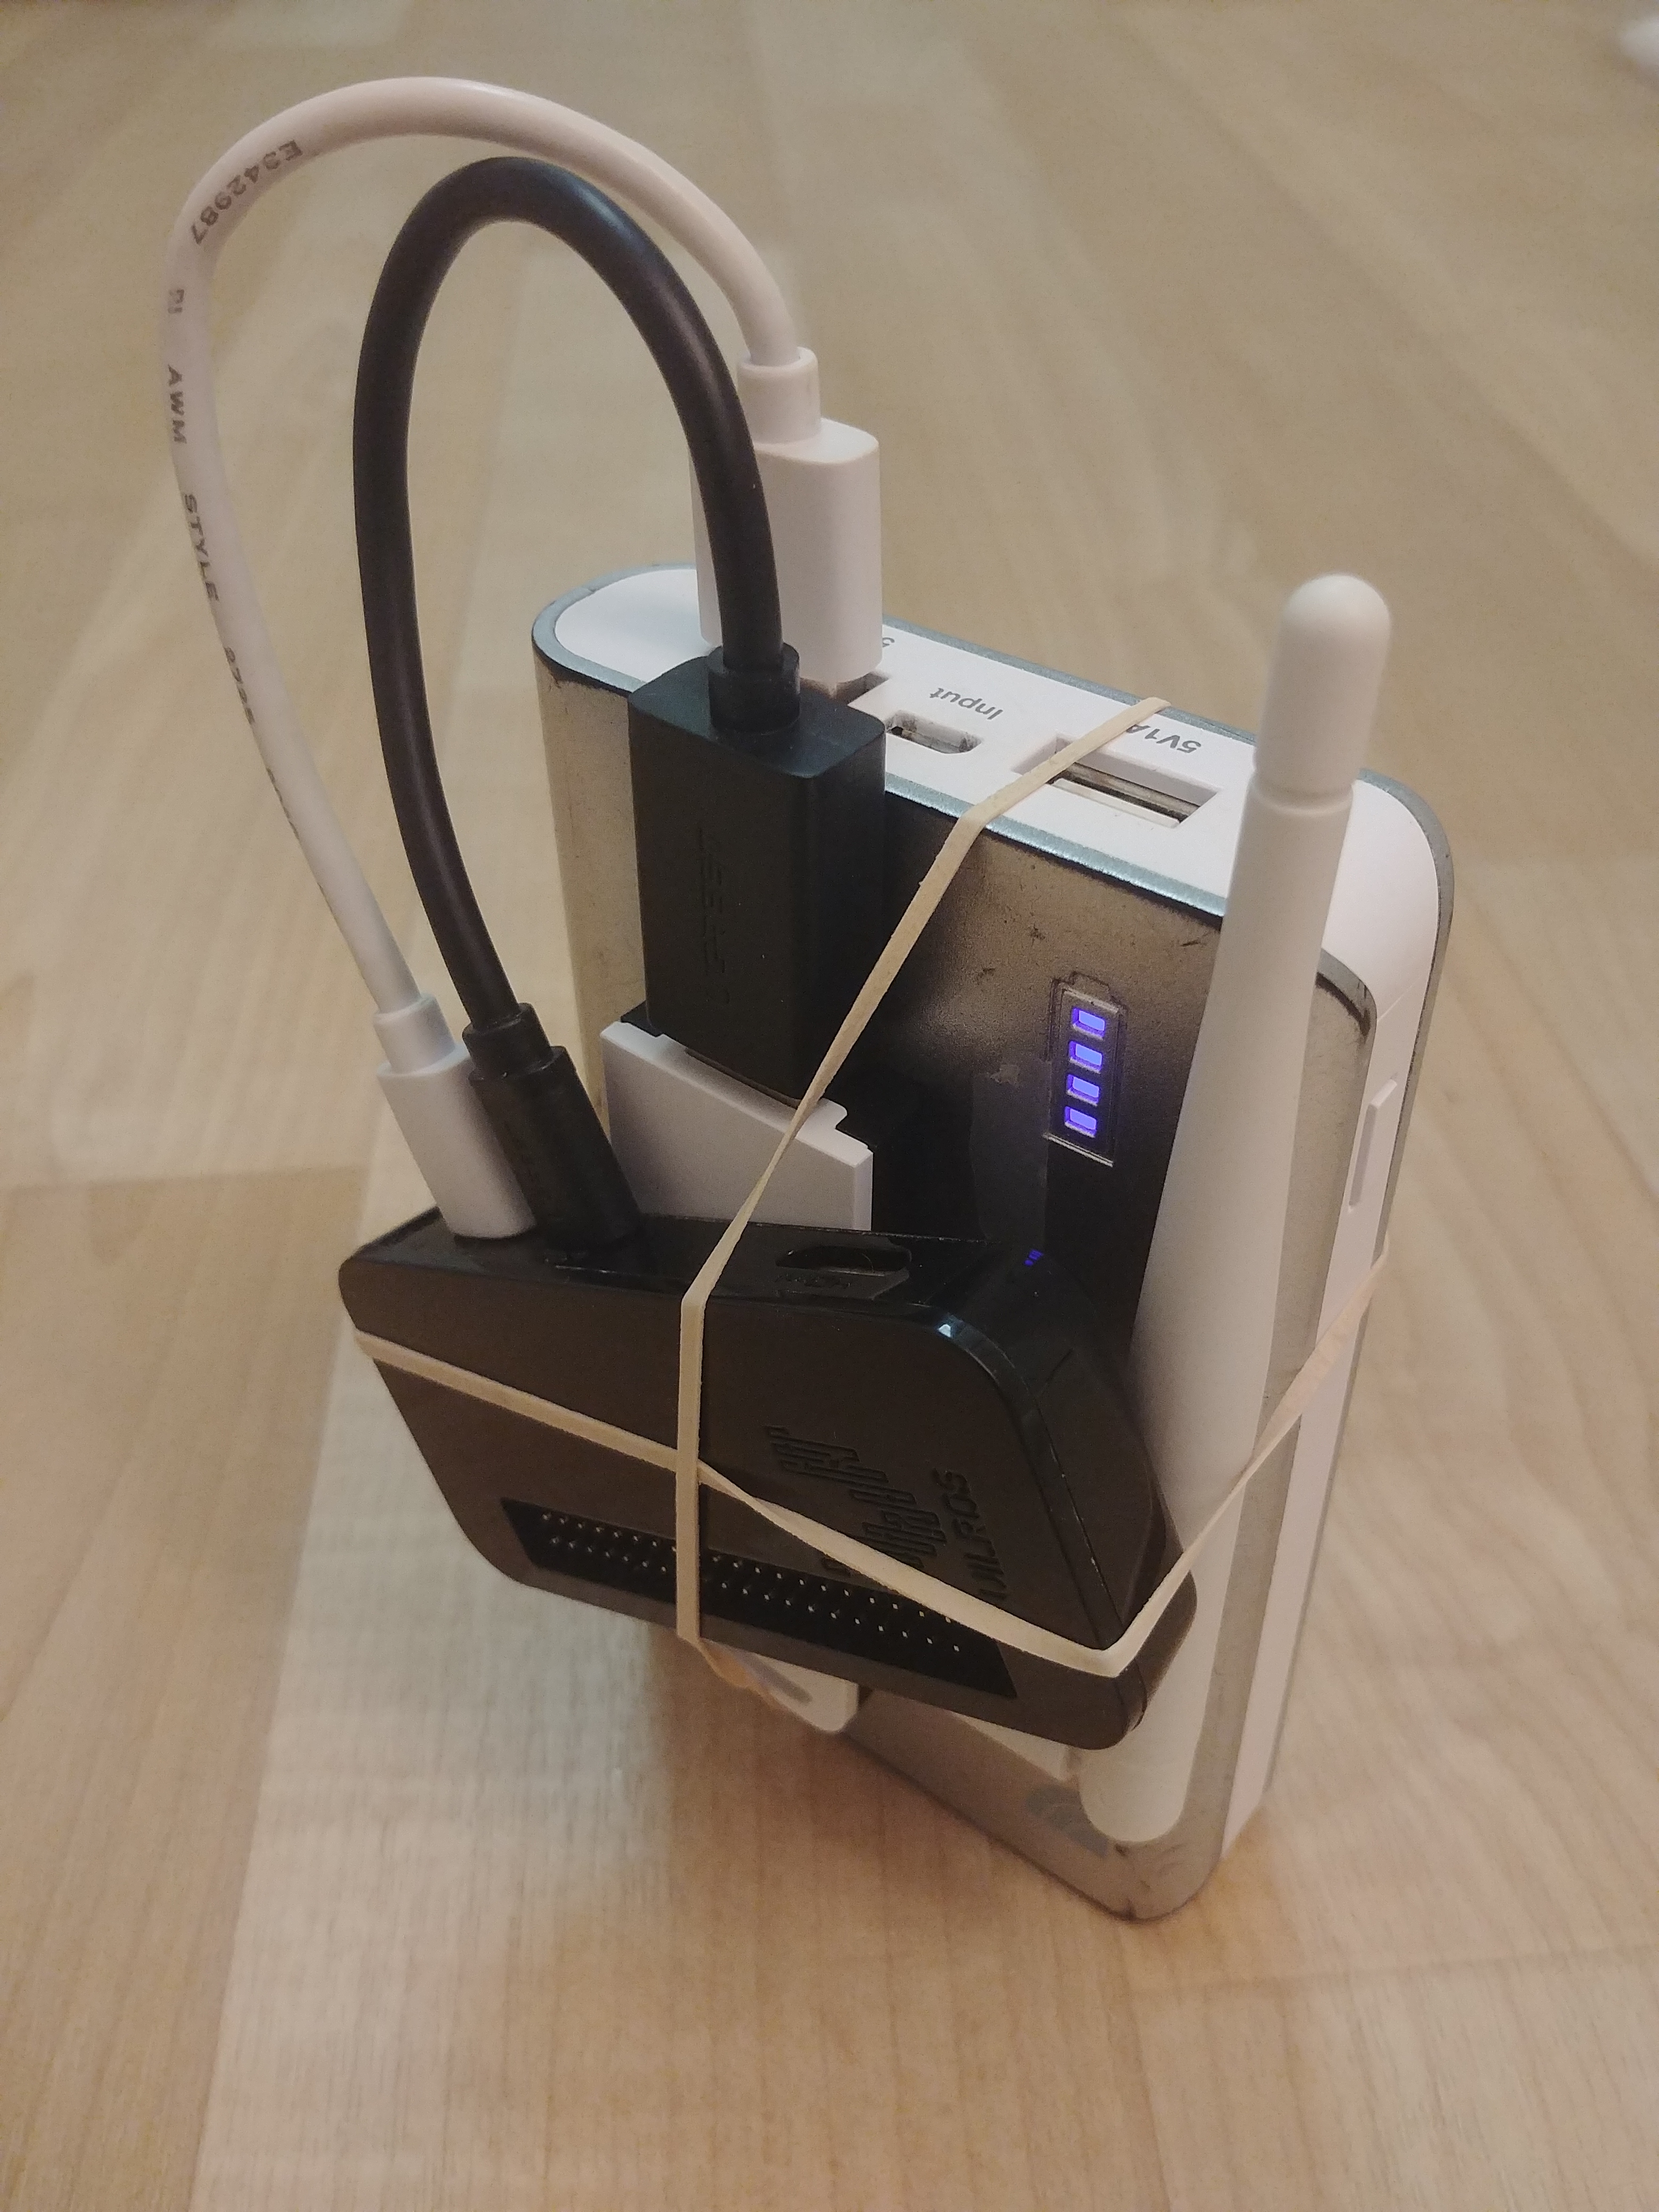
Here's what my completed system looks like physically:

Here's the web UI. To get to it, connect to the PirateBox's wifi network (PirateBox - Share Freely) and open http://piratebox.lan

Whenever you boot up your PirateBox if you've configured encryption, you'll need to unlock the file share directory. Open http://piratebox.lan/piratebox/admin/unlock and enter the encryption password. Now, your files should be available.
If you're looking for some starter files to put on your PirateBox, consider the Buffalo Mesh Net Library or appropriate music from Dubioza Kolektiv.
🏴☠️

Comments
No comments yet. Be the first to react!