This is content was originally posted on the LibreOffice Design Team Blog
As we have seen in the previous posts ( 1st and 2nd ) there are many advantages of using templates. And you should use them whenever is possible, they will help you with consistency across documents and will make your workflow more efficient. So where should you start when creating a template?
Basic concepts
Firstly let’s see what we know:
- Templates take time to create but they are more effective in the long run
- Templates store formatting ( Page styles, Paragraph styles, Character styles, view all )
- Templates store document structure (Outlines, Shapes, Placeholders, automatic Fields, etc.)
This means, you will need to plan ahead when designing your template, it might take you a couple of hours but it will pay off. Planing here doesn’t mean to star from a blank page but rather analyse your needs by taking a closer look at your day-to-day documents and start from there. For more info on planing and designing templates I would recommend a read of “Designing with LibreOffice” chapter 3 by Bruce Byfield.
Don’t be caught up in the specifics
“Okay, but my documents are very different from each other, so no need for template right?” Hmm maybe, I don’t know your particular case but changes are that you are looking it from the wrong angle. Try not to be to caught up in the specifics of each document’s content and instead focus on the structure that those documents will need and their need for consistent formatting.
Example:
- You have the need for a document each time you are requested for a business estimate
- Content will vary but key pieces should be always in the same places
- You have many different clients / partners
- You want to communicate your brand in a consistent manner
In this case a template would be a great time-saver. Here is a rough example of what you could set in it
- Structure settings
- Automatic fields that automatically set your name as author and date
- Shapes (logo)
- Formatting settings
- A page style set to the required page size and margins etc.
- A set of styles of headings, body text, tables, etc.
Label everything
A common problem with documents in general is the poor labelling when using styles or any object for that matter. This is not only true but dramatically important when creating, updating or reusing templates. Hopefully this will help you keep everything tidier and will make the use of the template easier for you and everyone else.
- Check your styles and make sure they have semantic labels (F11). In doubt simply re-use and remix the already vast range of default styles. This way you don’t need to worry about semantics.
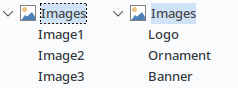
- Check your objects by accessing “Navigator” (F5). You can rename them by going to “Format > Name…”
Don’t create duplicated Templates
So you already have a couple of documents using one template but now something came up and you noticed that you might need to update an element from your branding or that you need to create a new character style to be used for foreign words. Do not duplicate your template in the hopes to be using a modified version for that new document! That might prove to be one ticket to messland.
Instead, update your existing template and use it for that document. Using the same template will also allow to updated existing document with the new branding and styles just:
- Update your template and save it
- Close LibreOffice
- Open an old file that uses that template
You will be prompt to update the document.LO is smart enough to update only the stuff that comes from the template, styles that are only on that document will remain untouched!
Always keep documents connected
When re-opening old documents after updating a template, LO will show you a dialogue if you choose to press “Keep Old Styles” this will detach the template for that document and thus defeating the purpose of your hard work in the first place.
Instead, update your document and do any required further changes (which should be none if you have proper formatting in place).

If this does not work for you then it might be a strong indicator that you have clean up to do in that specific document before updating the template and with it the document. Typical required clean up case scenario: you have modified inherited template styles in your document. Note that you can leverage the awesome “Edit” > “Find & Replace..” to find instances by style.
Don’t keep duplicated directories
When using the Template Manager you will notice that you can import a new template. Importing multiple templates can be tired-some and if you are not familiar with where it will stored, those files you might be willing to keep a duplicated folder with your templates. Don’t, this will soon or later lead to a messy workflow where you will need to re-import it; keep tabs on multiple folders; and worse will not prompt you to update your existing documents (since the template is a new import).
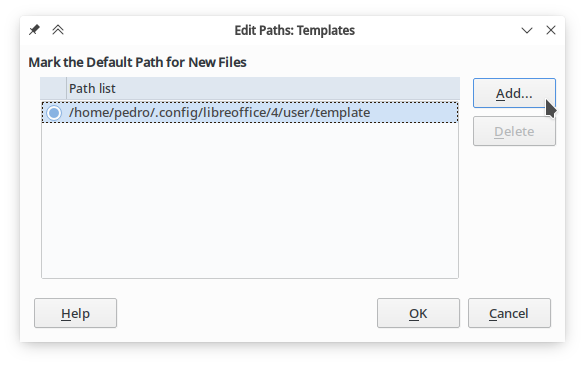
Instead, go to “Tools > Options” and choose “Paths” and finally “Templates” on the right. You will see what folder is used for templates, better yet you can add another folder to that (so you can keep work on your preferred directory tree). For that you need to press “Edit…” and then “Add”. All templates dropped in that folder will be available under the category “My Templates”.
Think first before you click
As pointed out previously for Impress, think before you click. And this is also true when thinking if you need one or more templates and how should they be. They key is to ask yourself: “What document I often create?” Notice I wrote create not need as thinking about what one needs might actually trick you in thinking you need something more complex than you actually use.
Don’t copy, transfer
It might happen that you want to create a new template based on an existing template or document. For example you might have have a template for a regular press release and now you want to create a new template to be used for press releases during holiday season (with different key graphics from your branding etc.). Instead of copy pasting stuff back and forward to bring the styles in why not transfer them?
- Press F11 to open the Styles and Formatting window
- From the pull-down menu at far right of the icon bar (with a plus icon), click “Load styles”
- You can now load styles from any existing template from your Templates Paths
- Or you can load it from a file (“from file”)
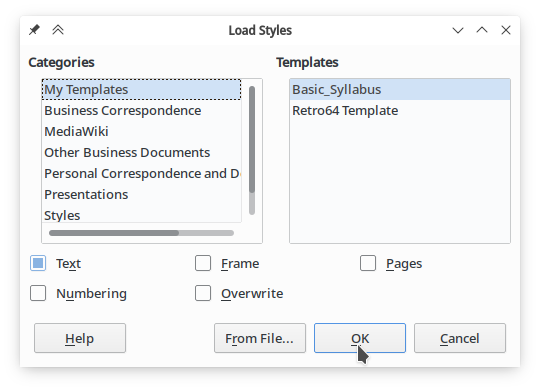
This method is safer and allows you to filter the types of styles you want to transfer.
“Nice, but I do not see Paragraphs nor Characters in the load styles dialogue”, True, they are under one and the same time labelled “Text”.
Use Text Flow options
Use the available options included in Paragraph styles to avoid a single lines at the bottom (widow) or at the top of the pages (orphan) in your body text. Edit the respective style by pressing F11; selecting the style and right click “Modify…” and select “Text Flow” tab. In here, under options, you can account for widows and orphans by specifying the minimum
- number of lines in a paragraph before a page break (Orphan control)
- number of lines in a paragraph in the first page after the break (Window control)
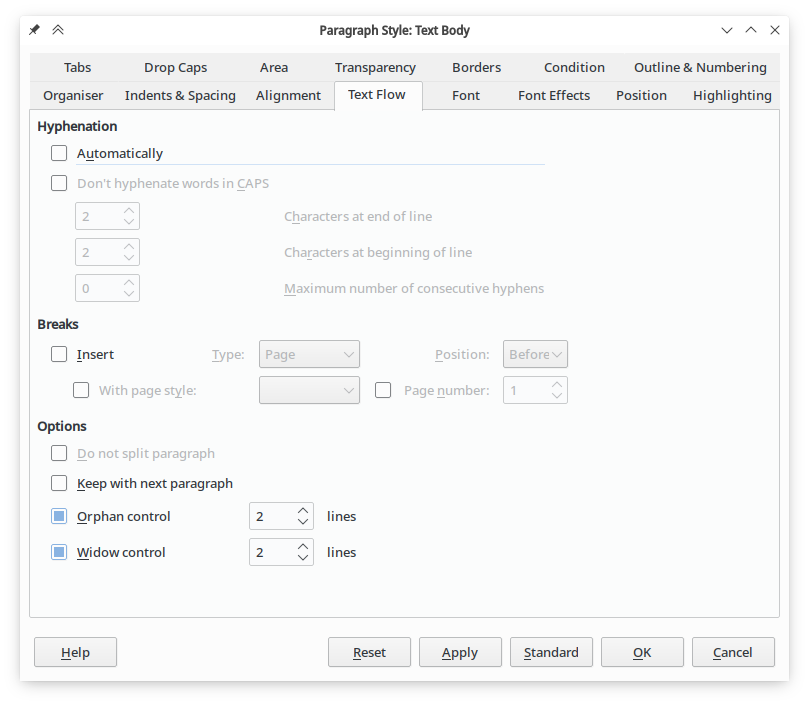
Alternatively, you can uncheck those and instead enable “Do no split paragraph” which will shift the entire paragraph to the next page or column after a break is inserted. More info on Text Flow option.
Don’t go overboard in your font palette
Personal taste is important but please beware of:
- The bigger the amount the harder it will be to keep things tidy and maintainable
- If it’s already harder for you to design a template, make your live easier and stick with one font family, two in the maximum
- Use special fonts that are not included in the default set only when there is no other option
- This will make easier if you work with someone (no need to worry about sending fonts)
- Changes are that the default font set in your installed LO is enough for your needs, take some time to explore it and experiment with it before downloading extra fonts
You might want check Help documentation: Fonts or Italo’s blog post for extra info, particularly on replacement techniques.
Use styles wisely
LibreOffice Writer as any other word processor allows you to change your document in two ways:
- Direct formatting: Although very popular, it should be used only as a pre-step before creating or modifying a style (using one of the options available from style options dropdown). Any further use of manual formatting should be avoided in favour of Styles.
- Applying styles: The right way to design your document. Each style has a set of text attributes many unavailable via direct formatting. Plus it gives you the power to design once and apply or update everywhere without a sweat!
To get get a consistent and maintainable design you need to use styles. And this is even more dramatic when designing a theme that will be applied to multiple documents. The more well-thought-out your template is the more consistent your documents will be. Example, imagine that you have a 10 page document and now after some thought you realize that you would like to highlight some words with a yellow background to convey the sense of “notes” you have two options:
- Wrong: Click countless times in the “highlight colour” icon for every instance
- Right: Create or modify a style specifically for those “notes”:
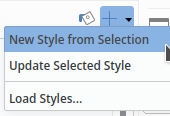
- Click once in the “highlight colour” icon; Press F11; Click the style actions (“+”) dropdown; Choose “New Style from Selection”
- If you already have a style for your notes: Select a word with that character style in your text and Click once in the “highlight colour” icon; Press F11; Click the style actions (“+”) dropdown; Choose “Update Selected Style”
- If you already have a style for your notes: Press F11; Select an existent style from the list; Right click and choose “Modify”; Select “Font Effects” tab; Set a “Font colour”; Click “OK”
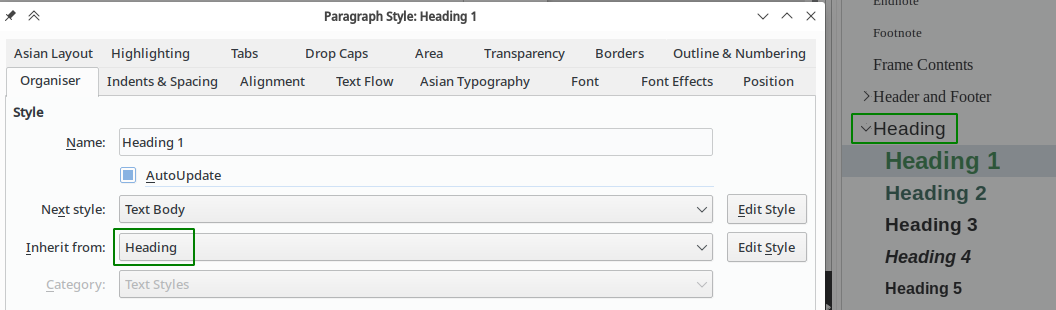
Create families of styles
Benefit from the style inheritance to use an existent style as a starting point for a new style. Thus creating “families” of styles where altering an attribute from the parent style will automatically affect its children (if, of course, they do not have a different value for the attribute on their own). Example, you can have a series of headings all inheriting base attributes such as font family while diverging in color and size:
Use the AutoUpdate Feature
When working with paragraph styles you have at your disposal a nifty way to keep your styles in check and direct format proof. The AutoUpdate options placed inside in the “Paragraph Style” dialogue > “Organizer” allows you, when enabled, to take any modification, including direct formatting, into account and automatically apply it to the respective paragraph style. Thus updating instantly all paragraphs with that style in your text.
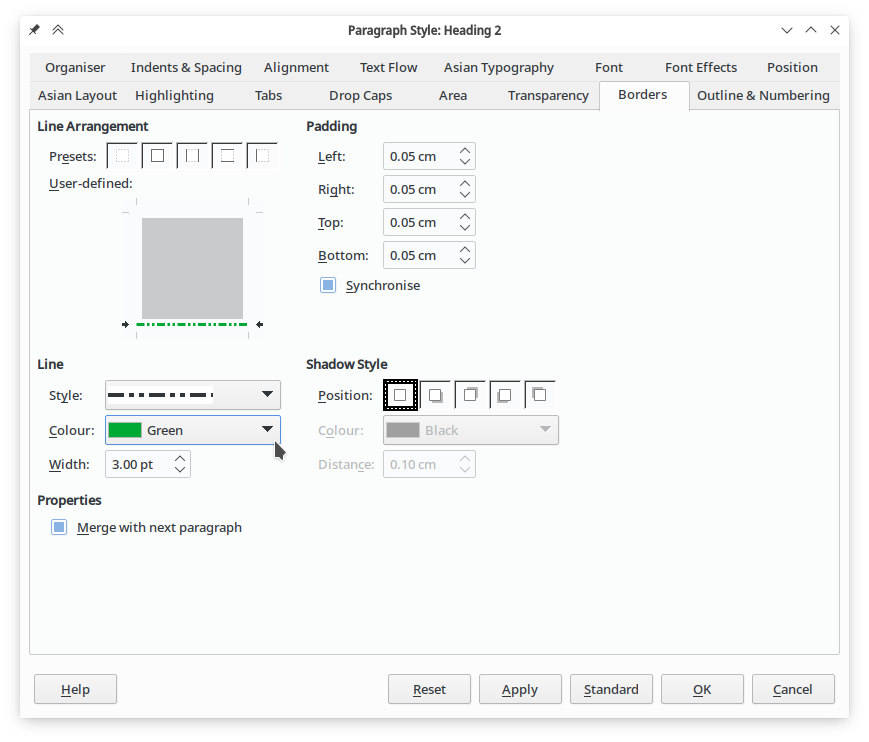
Don’t mimic borders or lines
If you want to have underlined text do not use direct formatting and do not insert lines. You will be better served by creating a paragraph style exactly for that by leveraging the Borders tab inside of Paragraph style dialogue. This in turn will give you fine tuning via many advanced features such as, line style, line colour, line thickness, padding and shadow. For example if you need to print a document with blanks to be filled by other, do not use workarounds like a multitude of underscores instead use a paragraph style with bottom border set to you preference.
Note, if you need to create a questionnaire LibreOffice has in its arsenal a set of tools specifically targetting forms. Within your template you can click in Form” menu > “Design mode” then you will see under the same menu a form control labelled “Text Box”, insert it and save your template. Now every document created from that template will have that form control and it will be possible to fill it out.

On the left a template with the form control and its default text and on the right a document with the form control filled in.
Use fields where possible
In many cases you might feel the need to have text that encompasses data that changes or might change over time, such as author name of a document, current date, Title, Path of the document in your computer etc. For all these do not type it manually, use fields. To access it simple head over to menu toolbar: Insert > Fields > More Fields… (Ctrl + F2).
Please note that this is not an exhaustive nor complete piece on templates. For more detailed information please read:
- All the super complete books and documentation made by the great documentation team.
- Not a fan of reading on a screen? we got you covered.
Share with the community
LibreOffice is a community project. It’s made for you and made by you. Everyone can contribute not only with code but also with nice designs. And you can share the templates on our extensions site. In this case you should consider localization and internationalization. While a fancy font on your computer might look good, it’s probably not installed on the other system and your design becomes broken. And, of course, don’t use proprietary pictures. Ideally, you clear all language specific content and replace the text by Lorem Ipsum content.

Comments
July 21, 2021 05:15
@pedro.silva thank you for sharing #LibreOffice it is useful. Please keep up your good work.