Having been using the wonderful Write.freely blogging platform for a couple of weeks now, I finally came across a nice documentation page (French language). Wish I had seen it earlier, as I did not find much information to learn from when I started.
The Guide was prepared by Ange, and meant to help people interested in using the write.freely instance at TeDomum.net -- which has been home for all my writing in blogs so far.
![]()
Since there's not much documentation, I thought it useful and an interesting project to take Ange's Guide and prepare an English translation, post it on my blog and spread the word.
- Originally posted by @angedestenebres - @angedestenebres@mastodon.tedomum.net in Mastodon.

-
Original posted at TeDomum Wiki Documentation
-
Raw html was copied from source above; then patiently paginated for human consumption and cleaned up. Most html tags were removed, replaced with MarkDown equivalents; much nicer to use!
-
I have really enjoyed discovering the simplicity and power of MarkDown -- learned a lot with the wonderful, interactive Tutorial Guide page.
-
An interesting project, diving into this and seeing the complex code generated by the Wiki for a typical page.
General :
Write Freely allows you to create blogs connected to the Fediverse. Its interface is quite simple but allows you to use HTML and Markdown for page layout, formatting, inserting images, etc.
Signing up for the service :
Registration for the service is done very simply by filling out the signup form at Writefreely instance homepage.
Note that there is no need to be registered to view and read a blog.
Using Write.freely :
First of all, you need to log in via the write.freely instance homepage.
Editor's Note : Signing up at other Instances ?
You can also sign up at any of the instances allowing new accounts! There are also lists on: The-Federation.info and Fediverse Network
User Interface and Controls :
By passing the cursor over the top menubar, where some buttons are already visible, other functions buttons will appear. It is with this menubar that you will be able to navigate between the different pages :

- The
1button allows you to go to the page allowing you to view or customize your blog. - The
2button is a drop-down menu:
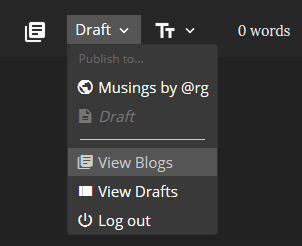
The first two options allow you to choose whether you want to Publish your article (making it worldwide visible) or if you want to keep it as a Draft (not visible, for further editing, etc).
Note that if you want to preview your article before publishing it, the choice of draft is recommended.
The View Blogs has the same function as the button 1 described above and the View Drafts option does the same as the 6 button.
Finally, the Log out option allows you to log out of your account.
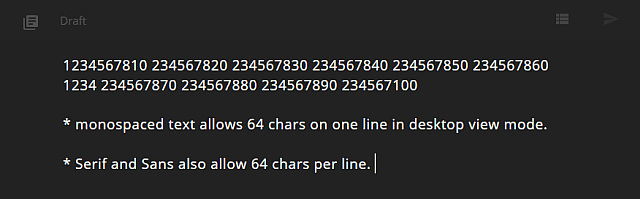
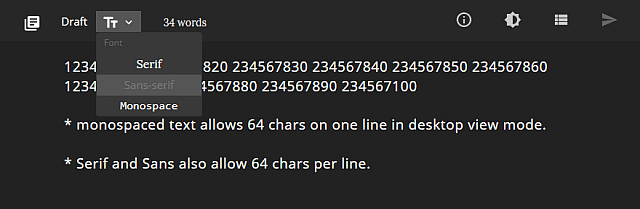
The 3 button allows you to choose another font.
The WordCount 4 allows you to see the number of words contained in the article being written.
The 5 button allows you to switch the editor to Dark Mode :
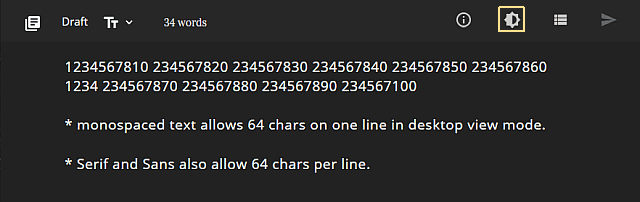
(editor's note: my preferred mode, since it's so much easier on the eyes for long editing sessions)
-
The
6button allows you to see the drafts you have saved previously. -
The
7button allows the article to be Published (going visible and live on the web).
Writing an article :
Which Formatting Codes to use :
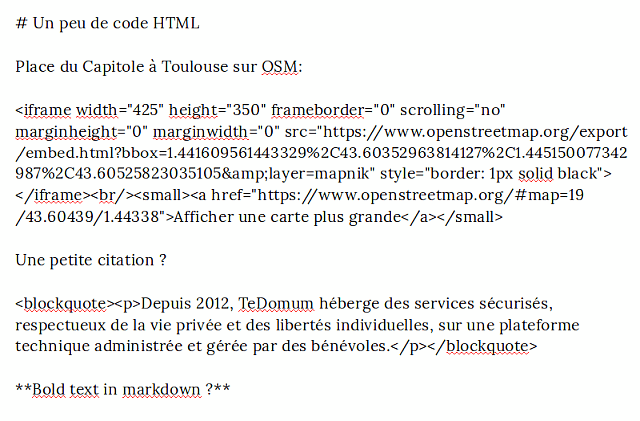
It is possible to use HTML markup tags or the simpler and easier MarkDown ones; or make a mix of both types.
- A mix of HTML markup tags and MarkDown ones in the Editor Window :
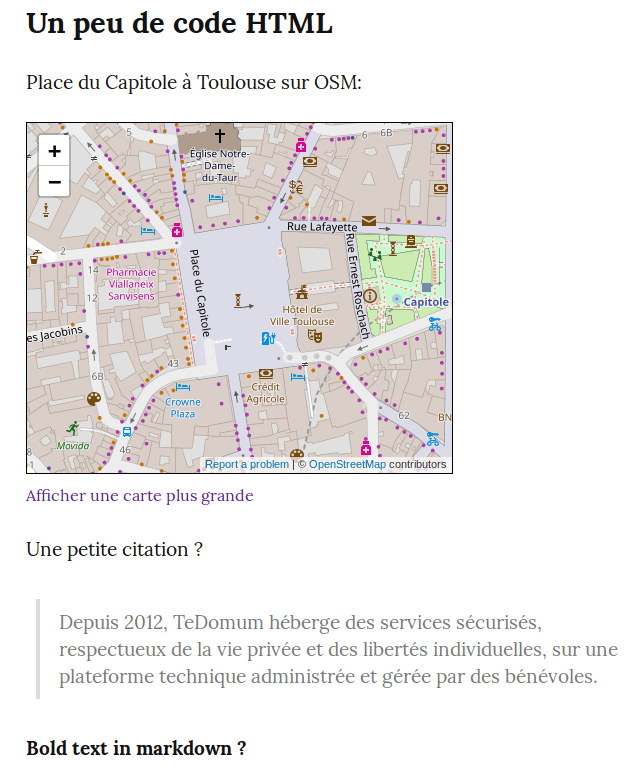
- Which displays so on a browser :
-
All MarkDown tags accepted are listed and explained in the Write.as guide.
-
(Editor Note: See also interactive MarkDown Tutorial Guide.)
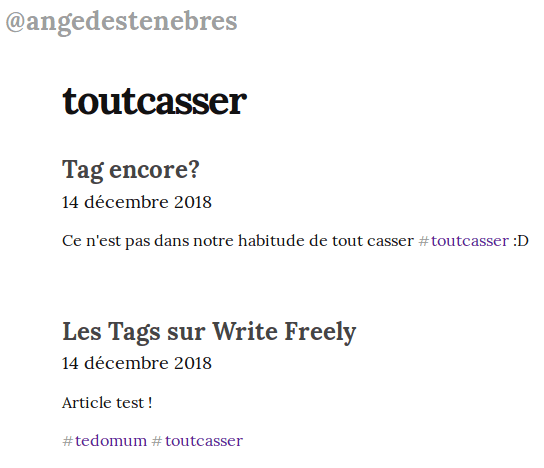
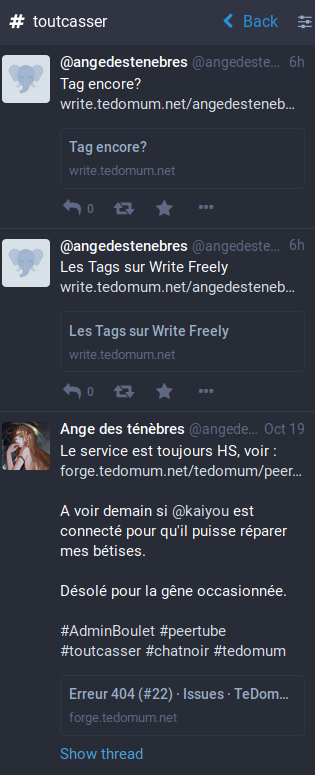
Using a HashTag (ou Tag) :
Tags can be used on Write.freely. To do this, just put hashmarks in your article - followed by the word you want. This will make it possible to make a list of all articles with a common subject and better reference your articles, especially under Mastodon.
Example with the hashmark "#toutcasser" :
Who will go link back into Mastodon, even if not visible in the message :
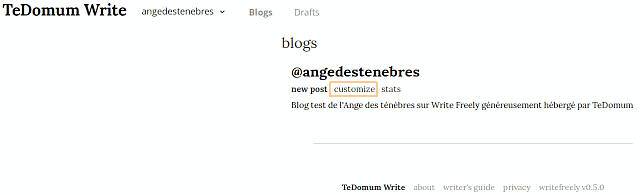
Personalize your blog presentation :
It is possible to customize the presentation of your blog (description, display of articles etc...)
To do this, you have to go to your blog and select the option customize:
At the bottom of the page, you'll have the option to add your own CSS:
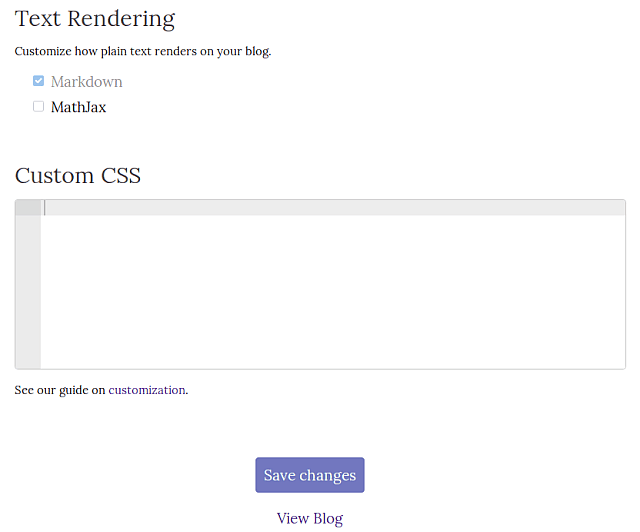
Please note that you can use this Reference guide to CSS to write it.
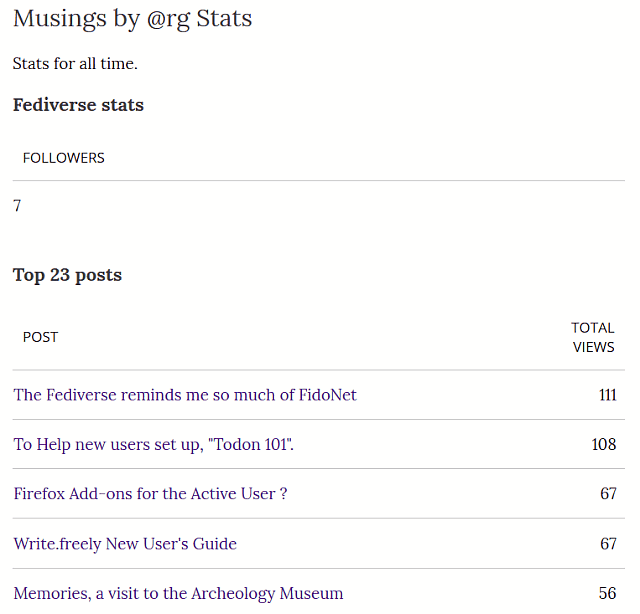
Statistics for your Blog pages :
To see uptodate statistics for all of your pages, go to your blog and select the option stats:
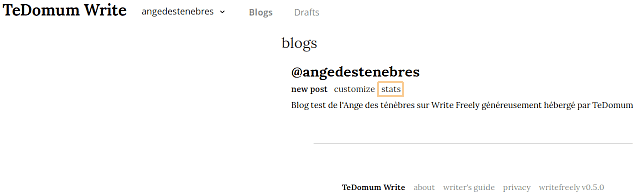
You will then see a page like this:
Editor's Notes :
-
A big Thank You to Ange for preparing her original French Wiki documentation version -- it made creating this English version much easier that creating a totally new guide from scratch.
-
I have added extra wording in some places above, thinking it might make it easier reading for a new user; the intended audiece for an Introductory Guide like this.
-
The French original text was translated in paragraph blocks via the wonderful Bing Translator tool.
-
Any errors possibly introduced in the process of preparing this version are my own.
-
And just found a Writer's Guide at Writefreely.org itself. Bookmarking!
Thank you for reading this, please feel free to comment about this post, your input is important. This page created entirely in MarkDown language.
 R.G. @design_RG@Qoto.org

Comments
September 21, 2022 04:42
For me, I’m about to start reading “The Long Way to a Small, Angry Planet” by Becky Chambers and the reason why I picked it up is because weaver game I have heard so many people rave about it. Well, that and the cover are which is particularly gorgeous. I’ll be interested to see what comes of it.
November 7, 2022 02:01
Hugely popular and always producing fantastic viral games is the survival genre. Treasure hunts and base construction are common features in survival games. Additionally, keep in mind these guidelines when playing survival games: avoid starvation, always keep in mind feeding, drinking, and wellness, and keep an eye out for enemies. You should also take into account the fact that some survival games offer early access beta versions so players may try out the action before the game is even launched. Speaking of games, download Tiny Island Survival game here.
November 9, 2022 21:58
Award-winning online casino that focuses on creating a positive vibe for players who choose to play with us. casumo.