In this tutorial you will learn how to install and configure the GNOME desktop environment. I chose GNOME because it is a light-ish desktop environment and it looks pretty nice out of the box.
Let's go back to your Arch installation. All you have on it is the 100+ default Arch packages, sudo and iwd.
You will have to install your graphics drivers. Since I have a intel graphics card, I install the package xf86-video-intel. Here is the table on the ArchhWiki with the drivers you will need.
You will also have to install xorg, the Graphical user interface server.
$ sudo pacman -S xorg
Now we can move on to installing GNOME
$ sudo pacman -S gnome gnome-extras
(You don't have to install gnome-extras.)
When it is done, which will take quite a while, you will want to enable GDM (GNOME display manager.) Type this:
$ systemctl enable gdm.service
Now you can reboot.
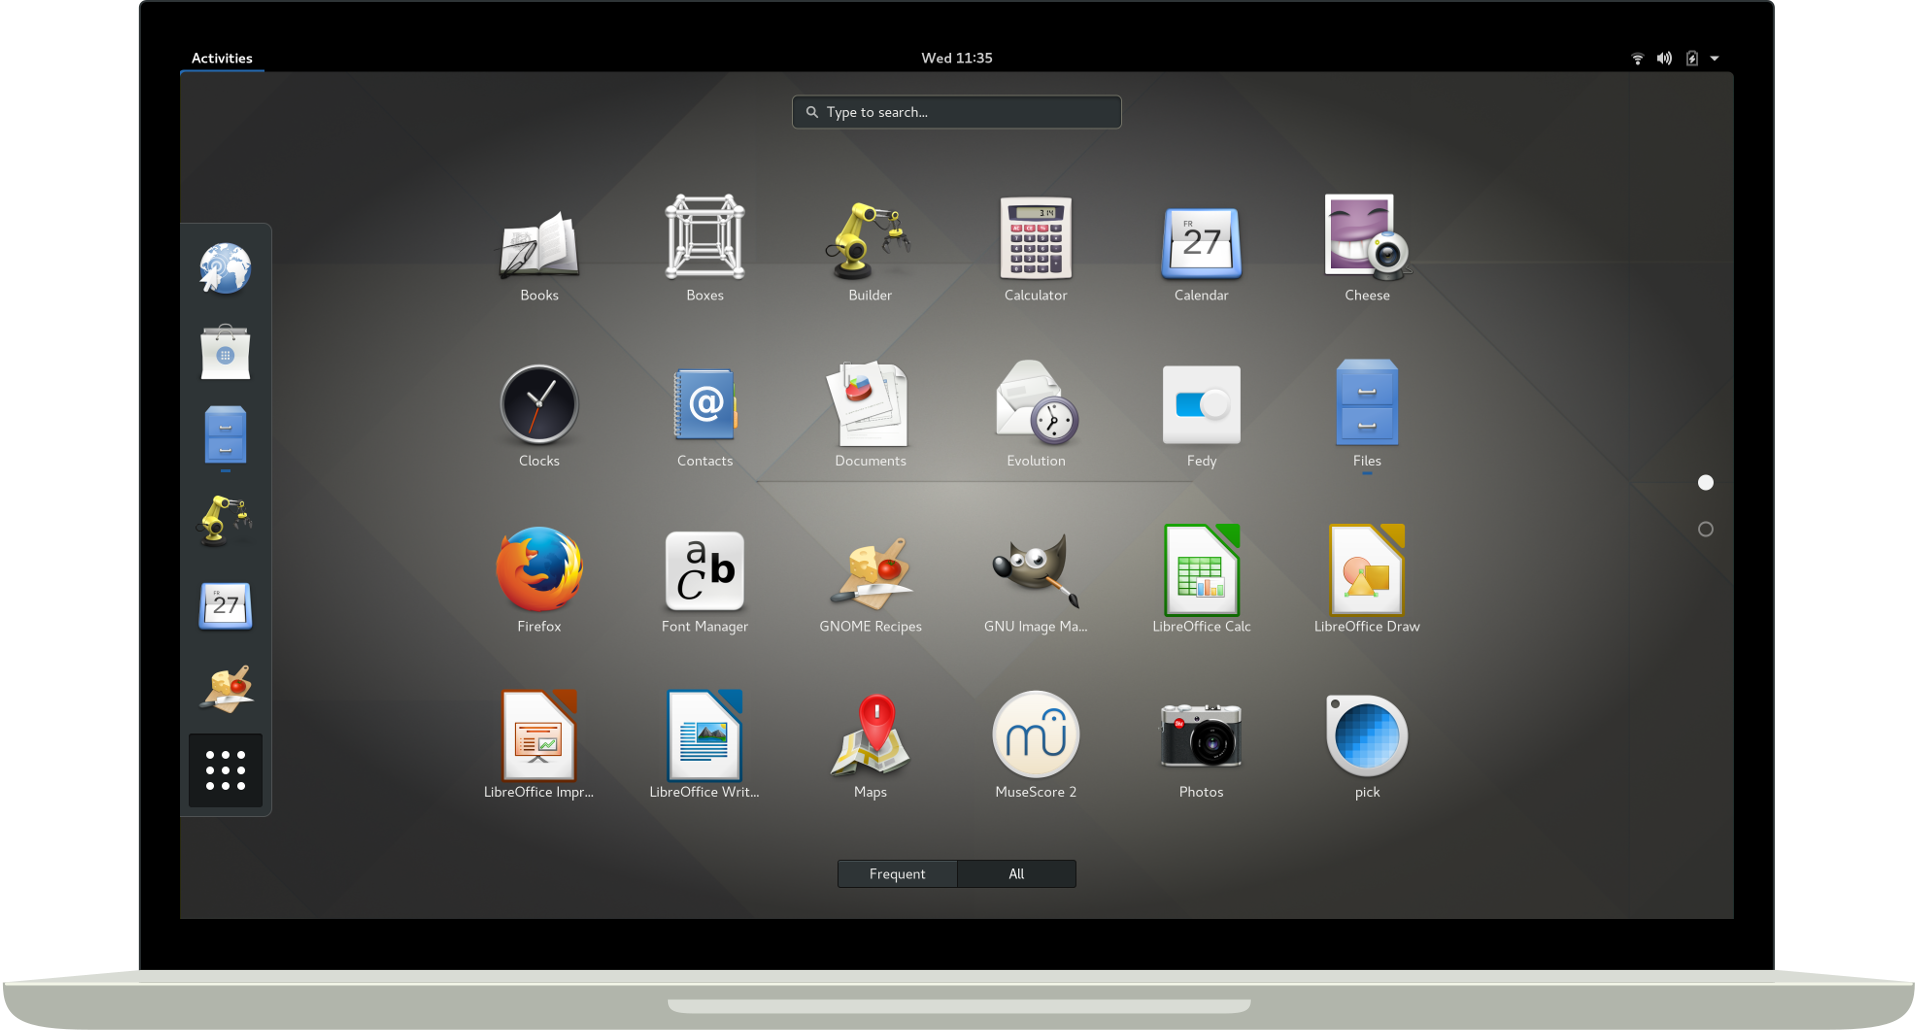
This time you will have a GUI to sign in. Log in and you will be greeted with this nice little desktop:
Now, we have everything here except for the wifi drivers. Iwd does a great job in the terminal, but we want a GUI wifi manager.
Type these commands:
$ sudo pacman -S networkmanager
$ systemctl enable NetworkManager.service
Now in settings, you can switch or turn of wifi.

Comments
No comments yet. Be the first to react!